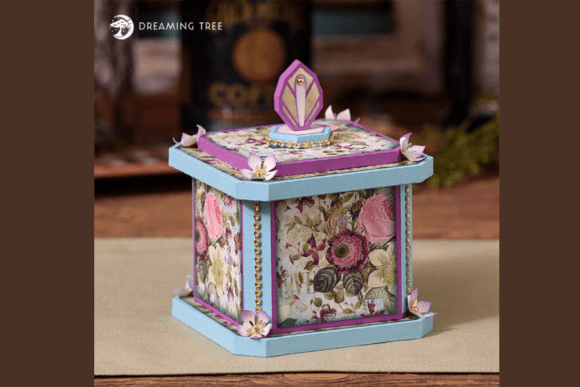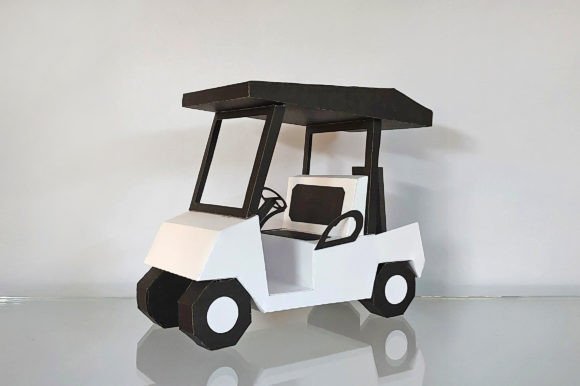
Crafting Your Own Miniature DIY Golf Cart: A Complete Guide
In the world of paper crafting and model making, few projects offer the same blend of nostalgia, precision, and creative satisfaction as building a DIY Golf Cart. Whether you are a hobbyist looking for a weekend project, a teacher seeking an engaging classroom activity, or a small business owner needing unique decorative elements for a themed event, this miniature assembly provides a tangible connection to design and engineering on a manageable scale. The appeal lies not just in the final product—a charming 13 x 7 x 15 cm replica—but in the process of transforming flat digital files into a three-dimensional object through your own hands.
The Appeal of Paper Engineering
Paper engineering is an art form that bridges the gap between two-dimensional design and three-dimensional reality. When you embark on creating a DIY Golf Cart using digital templates, you are participating in a tradition that dates back centuries, yet it feels incredibly modern when utilizing high-resolution digital files. The project is designed to be accessible; with an assembling time of approximately 2 hours, it fits perfectly into a relaxed afternoon or an evening of focused creativity.
The value of this project extends beyond mere entertainment. For professionals in design fields, working with physical models helps visualize spatial relationships and structural integrity in ways that screen-based modeling cannot. For educators, it serves as a practical lesson in geometry, following instructions, and fine motor skill development. Even for casual creators, the tactile experience of scoring, folding, and gluing cardstock offers a therapeutic break from the digital noise of daily life.
Understanding the Digital Assets
The foundation of any successful paper model is the quality of the source material. In this case, you will receive a comprehensive suite of digital files including PDF, EPS, DXF, and PNG formats. Each format serves a specific purpose, ensuring compatibility with various tools and skill levels:
- PDF: The most user-friendly option for general crafters. It is ready to print immediately on standard A4 or Letter paper, preserving the exact dimensions required for the 13 x 7 x 15 cm assembled size.
- EPS & DXF: These vector files are ideal for professionals or advanced users who may wish to scale the design, modify specific components, or use a cutting machine like a Silhouette or Cricut for precision.
- PNG: High-resolution raster images useful for previewing the design or incorporating the graphics into other digital projects.
Having access to these varied formats ensures that the DIY Golf Cart project is adaptable. Whether you are printing at home on a colored printer or sending files to a professional print shop for heavy-duty cardstock, the flexibility of the file types supports your specific workflow.
Essential Tools and Materials
To bring your miniature vehicle to life, preparation is key. While the concept is simple, the quality of your final model depends heavily on the materials and tools you employ. The project specifies the need for A4 Letter CARDSTOCK PAPER. This is crucial; standard printer paper is too flimsy to hold the structural shape of the cart, while overly thick board may be difficult to fold cleanly. A weight between 65lb and 80lb cover stock is typically ideal.
Beyond the paper, your toolkit should include the following essentials:
- Colored Printer: To ensure the vibrant details of the golf cart—such as the wheels, seats, and body panels—are rendered accurately.
- Scissors and Craft Knife: Scissors are excellent for curved edges and general trimming, while a sharp craft knife is indispensable for intricate cutouts and straight lines.
- Ruler: A metal ruler is preferred when using a craft knife to prevent accidental cuts into the measuring tool itself.
- Scorer or Bone Folder: This is perhaps the most important tool for a professional finish. Scoring the fold lines before bending prevents the paper from cracking and ensures crisp, clean edges.
- Non-working Ball Point Pen: A clever trick for crafters; running out of ink allows you to use the ball tip to score lines without leaving ink marks on your model.
- Glue: A high-quality white glue or a glue stick is necessary for securing the flaps. Avoid liquid glues that can warp the paper if applied too heavily.
Step-by-Step Assembly Strategy
The journey from a flat sheet to a standing DIY Golf Cart follows a logical progression. First, print the templates full size on your chosen cardstock. Take a moment to inspect the print quality; ensure that colors are saturated and lines are sharp. Once printed, the cutting phase begins. Patience here pays dividends; rough edges will be visible in the final assembly.
After cutting, move to the scoring phase. Identify all fold lines indicated on the template. Using your scorer, bone folder, or non-working pen, gently trace these lines. The goal is to compress the fibers of the paper without cutting through them. This step makes the subsequent folding effortless and precise.
Folding should always be done away from the printed side for mountain folds and towards the printed side for valley folds, unless specified otherwise by the diagram. Once all pieces are folded, perform a "dry fit" by assembling the main body without glue to ensure everything aligns correctly. Finally, apply glue to the flaps and assemble the cart piece by piece. Hold each joint for a few seconds to allow the adhesive to set. The result is a sturdy, free-standing model measuring 13 x 7 x 15 cm.
Real-World Applications and Use Cases
Why build a DIY Golf Cart? The applications are surprisingly diverse. For event planners, these miniatures serve as delightful table centerpieces for golf tournaments, retirement parties, or corporate outings. They add a personalized touch that mass-produced decorations simply cannot match.
In the realm of education, this project is a fantastic resource for STEM programs. It introduces students to concepts of scale, structural engineering, and the importance of following technical diagrams. Teachers can expand the lesson by asking students to calculate the surface area of the cardstock used or to redesign the cart's features using the provided EPS files.
For content creators and social media influencers, the process of building the cart offers engaging visual content. Time-lapse videos of the assembly, close-ups of the detailed printing, and the final reveal of the 3D model resonate well with audiences interested in crafts and DIY culture.
Evaluating Suitability for Your Needs
Before starting, it is wise to evaluate if this project aligns with your current resources and goals. If you lack a colored printer, consider whether you have access to a local print shop that can handle cardstock. If you are working with young children, adult supervision will be required during the cutting and gluing phases, particularly when using craft knives.
Consider the environment where the finished model will be displayed. While cardstock is durable, it is not waterproof or resistant to extreme humidity. Indoor display is recommended to preserve the longevity of your DIY Golf Cart. Additionally, if you plan to make multiple units for a large event, factor in the 2-hour assembly time per unit to manage your schedule effectively.
Maximizing the Experience
The true joy of this project lies in the customization. Because you possess the digital files, you are not limited to a single iteration. You can experiment with different paper textures, such as metallic or matte finishes, to alter the look of the cart. You can even modify the digital files to add custom logos or names, making each cart unique.
Furthermore, the community aspect of crafting should not be overlooked. If you encounter difficulties during assembly or have ideas for modifications, reaching out for support is encouraged. Many creators offer assistance if you have questions, fostering a collaborative environment where tips and tricks are shared freely.
In conclusion, assembling a DIY Golf Cart from digital files is more than just a craft; it is an exercise in patience, precision, and creativity. It transforms abstract digital data into a physical object that can be held, admired, and utilized in various practical scenarios. With the right tools, a bit of time, and the provided high-quality templates, anyone can master the art of paper engineering and create a stunning miniature masterpiece.