Mastering the Pendulum Wall Clock SVG for Stunning 3D Paper Crafts
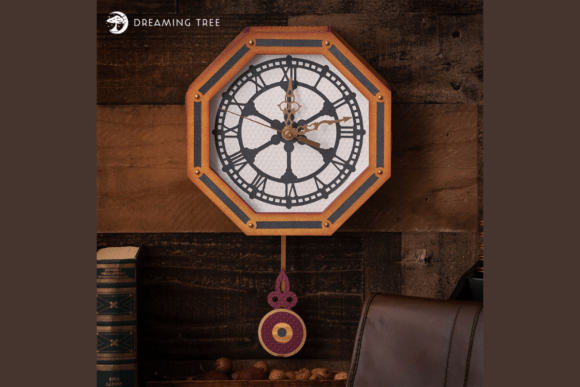
There is a distinct satisfaction in transforming flat sheets of cardstock into a functional, three-dimensional object that commands attention on a wall. The Pendulum Wall Clock SVG represents one of those perfect intersections between classic design and modern crafting technology. With its octagonal face, intricate Roman numerals, and a charming swinging pendulum, this project offers more than just decor; it provides a tangible connection to the art of paper engineering. However, diving into 3D paper craft without a clear understanding of the nuances involved can lead to frustration, wasted materials, and a final product that lacks the intended elegance.
Many creators, from hobbyists looking for a Father's Day gift to small business owners aiming to expand their product lines, are drawn to these designs because they promise a professional result with relative ease. Yet, the difference between a wobbly, misaligned clock and a sturdy, timeless accent piece often lies in the details that beginners overlook. Understanding the specific requirements of a Pendulum Wall Clock SVG – 3D Paper Craft is essential before you even load your cutting mat.
The Trap of Ignoring Material Weight and Grain
One of the most common mistakes new users make is treating all cardstock as interchangeable. When working with a complex layered design like this clock, the structural integrity of your materials is paramount. The supply list typically calls for specific weights, such as 65lb or 80lb cardstock, for a reason. If you attempt to build the deep box structure of the clock using standard copy paper or lightweight scrapbook paper, the final assembly will lack rigidity. The clock may bow under its own weight, causing the pendulum to snag or the face to warp.
Furthermore, the direction of the paper grain is frequently ignored. In 3D construction, folding against the grain can cause unsightly cracking on the surface of colored cardstock, particularly with deep shades like Boysenberry or solid golds. A better approach is to test fold a scrap piece of your chosen material before committing to the cut. Ensure your folds align with the grain whenever possible, or score deeply if you must fold against it. This simple check preserves the crisp, professional look of the Roman numerals and the octagonal frame.
Misunderstanding Scale and Resizing Limitations
Digital files offer the illusion of infinite flexibility. It is tempting to resize a Pendulum Wall Clock SVG to fit a specific nook in your home or to match a different paper size. While the file is indeed scalable, there are physical limits to how much you can shrink or enlarge a 3D paper mechanism before it fails. The original design dimensions—approximately 13.625 inches in height—are calculated to ensure the internal mechanisms, such as the pendulum swing and the layering depth, function correctly.
If you scale the project down too significantly, the tolerance gaps between moving parts may disappear, causing the pendulum to stick. Conversely, scaling up too much without increasing the paper weight can result in a sagging structure. Before resizing, consider the mechanical relationships within the design. If you must change the size, do so incrementally and be prepared to adjust your material choice. For instance, if you enlarge the clock, switch to a heavier cardstock to maintain stability. Always keep the original aspect ratio locked to prevent the octagonal face from becoming distorted, which would ruin the symmetry of the Roman numerals.
Overlooking the Assembly Sequence
Even with a comprehensive video tutorial, many crafters rush the assembly process, leading to confusion and potential damage to delicate pieces. The Pendulum Wall Clock SVG involves multiple layers that must be adhered in a specific order to create depth and allow movement. A frequent error is gluing the decorative face layers before securing the structural box components. Once the adhesive sets on the outer layers, accessing the inner tabs becomes nearly impossible without bending or tearing the paper.
To avoid this, adopt a "dry fit" strategy. Assemble the entire clock without glue first. This allows you to visualize the layering order, identify which pieces interlock, and ensure the pendulum swings freely. Use the included PDF legend to map out your color scheme during this phase. It is far easier to swap a piece of Yellow Pattern Paper for a different shade during a dry run than it is to pry apart glued layers later. This practice not only saves time but also ensures that your final build is seamless and sturdy.
Neglecting Color Contrast and Legibility
Aesthetic choices play a huge role in the success of this project. Because the design features intricate details like Roman numerals and a slender pendulum, poor color contrast can render these elements invisible from a distance. A common misstep is choosing patterned papers that are too busy or colors that blend too closely together. For example, placing dark brown numerals on a deep boysenberry background might look sophisticated in the digital preview, but in reality, it can make the time difficult to read and the details hard to appreciate.
When selecting your six sheets of cardstock and patterned papers, prioritize contrast between the base layers and the top decorative elements. Use solid colors for the structural layers to keep the focus on the detailed face. If you are using the DCWV Solid Gold Collection or Graphic 45 papers, reserve them for focal points where the light will hit them directly. Remember that shadows created by the 3D layering will darken the perceived color of the paper, so choose slightly lighter shades than you think you need for the recessed areas.
Preparing Your Cutting Machine for Precision
The quality of your cut directly influences the ease of assembly. A Pendulum Wall Clock SVG relies on precise tabs and slots to hold the 3D shape together. If your cutting machine blade is dull or the pressure settings are incorrect, you may end up with incomplete cuts or "weeping" edges where the paper fibers are torn rather than sliced. This is especially critical for the small, intricate parts of the pendulum mechanism.
Before cutting your final pieces, perform a test cut on a scrap of the same material. Check that the blade cuts all the way through without cutting into the mat excessively. Clean your mat regularly to ensure the paper holds flat during the cutting process; any shifting can result in misaligned layers that won't fit together properly. Taking ten minutes to calibrate your machine can save you hours of troubleshooting during assembly.
Ultimately, creating a beautiful 3D paper clock is about respecting the materials and the design logic. By paying attention to paper weight, respecting the mechanics of the swing, following a logical assembly order, and ensuring visual clarity, you transform a digital file into a heirloom-quality piece. Whether you are crafting for a loved one or building inventory for your shop, these precautions ensure that your Pendulum Wall Clock SVG project is a success, delivering the timeless elegance promised by the design.